If you already have and existing account created in Mail and want to add an account, click here.
Initial Installation
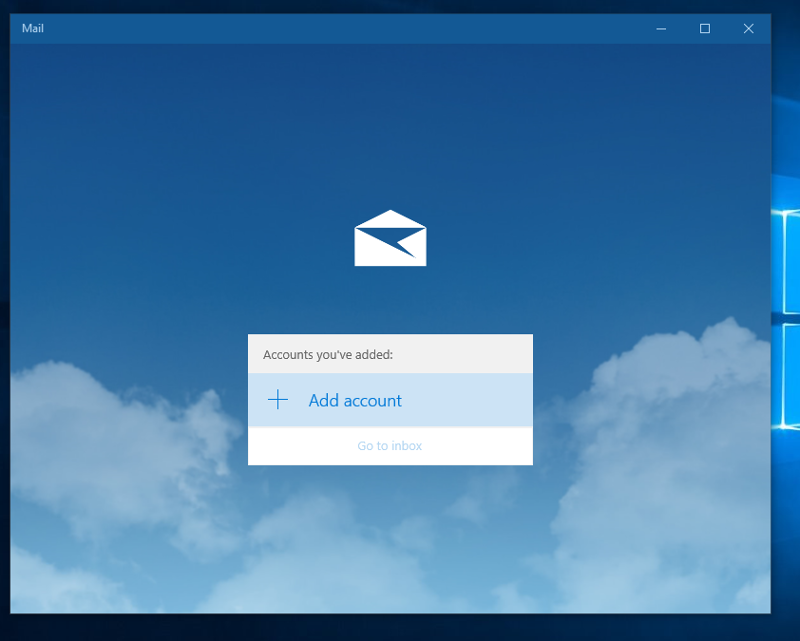
1) Begin typing “mail” in the search bar. Selections will appear. Select Mail.

2) Click Add account.
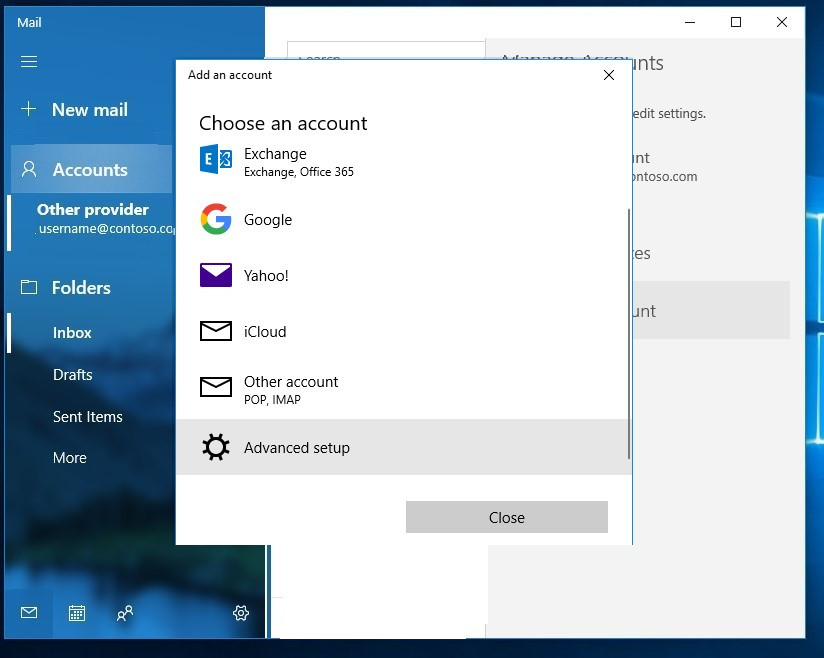
3) Move your mouse to the right border of the “Choose an account” window. A slide bar should appear.
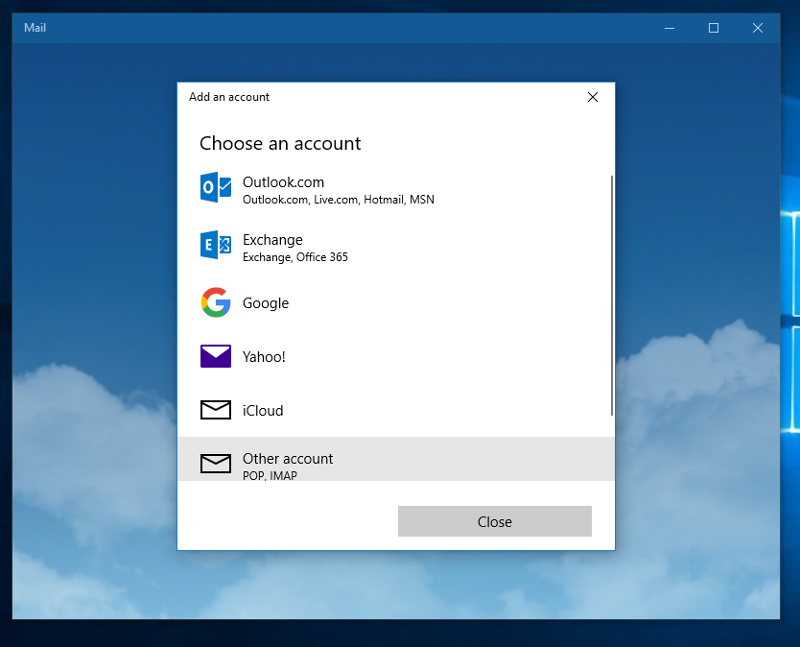
4) Slide the bar down to reveal the “Advanced setup” option and select it. NOTE: The slidebar will disappear shortly after mousing over it. Simply move over the right border again to activate the bar.
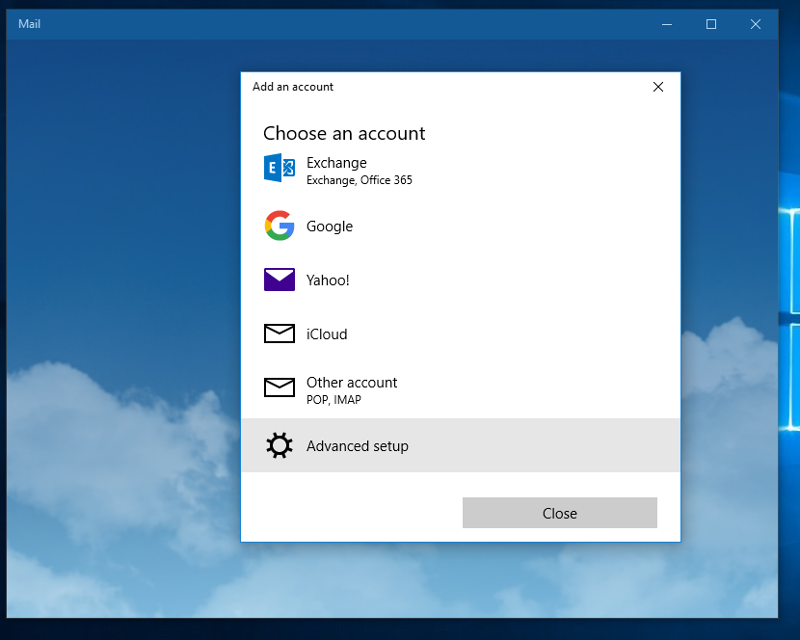
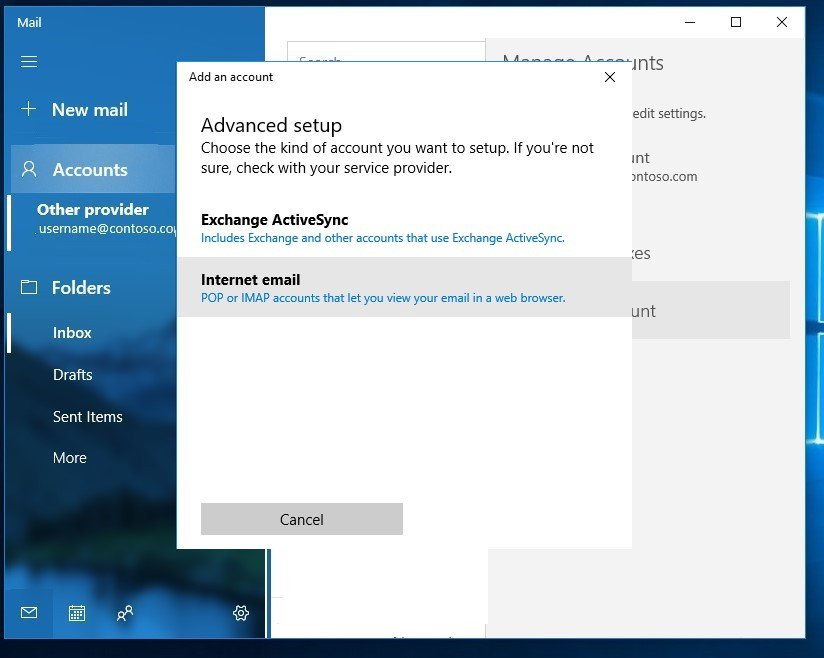
5) Select the “Internet email” option.
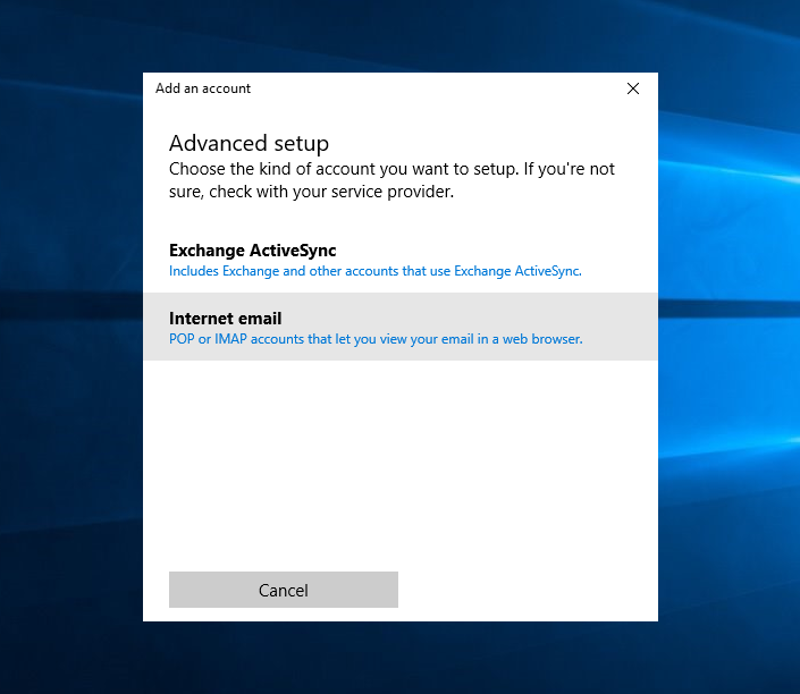
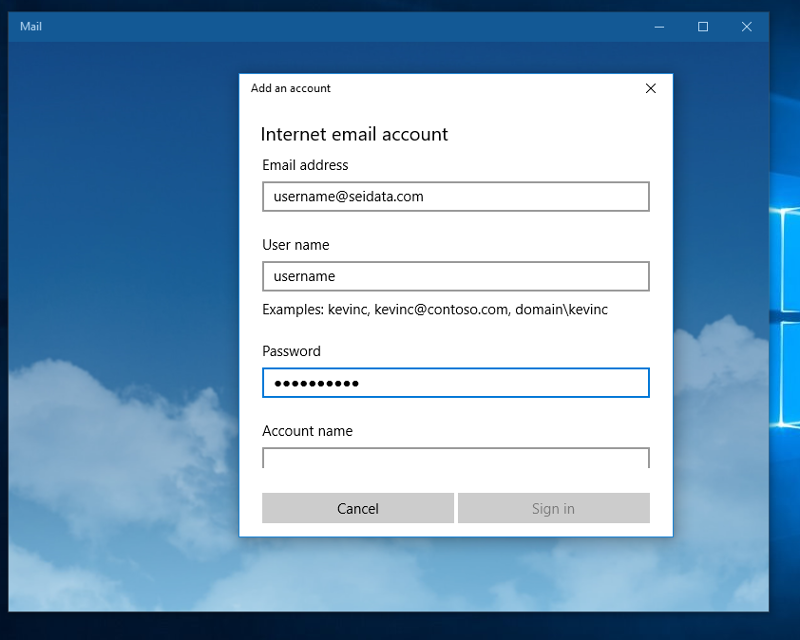
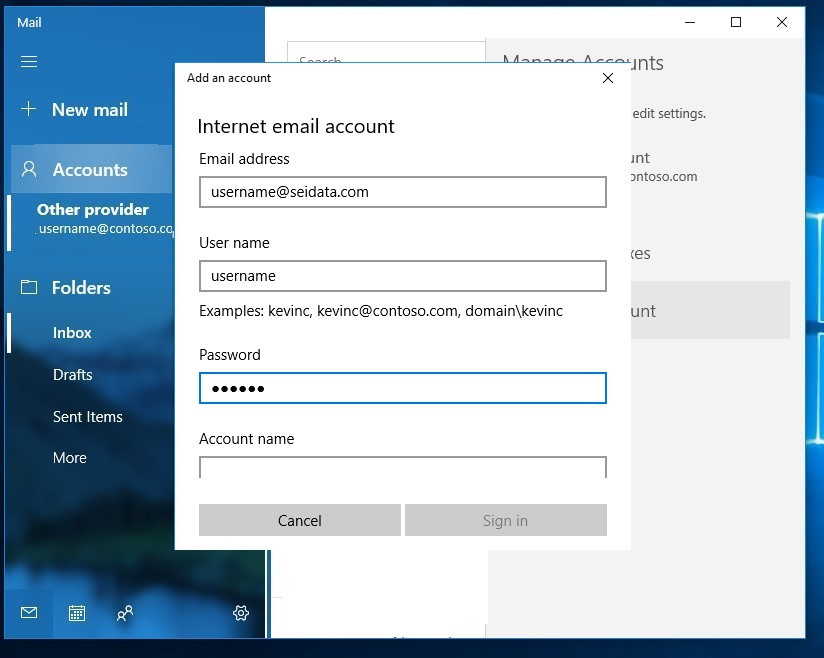
6) Enter your SEI e-mail address in the “Email address” field. Enter only your username (not the @seidata.com part) in the “User name” field. Enter your password on the “Password” field. NOTE: Once you begin to type the password, an icon will appear in the right corner of the password field. If you click and hold the mouse button, it will reveal what you typed for a password. Once you click away from the password field, the option to view the password is gone.
 NOTE: Use the TAB button, scroll button on your mouse, or move the mouse pointer to the right edge to activate the slide bar to move the fields as needed to continue the mail account setup.
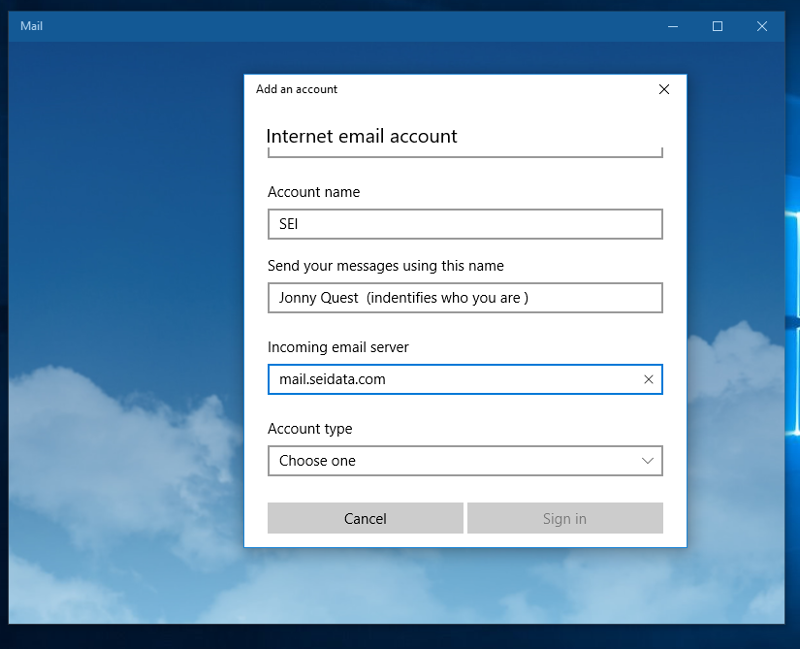
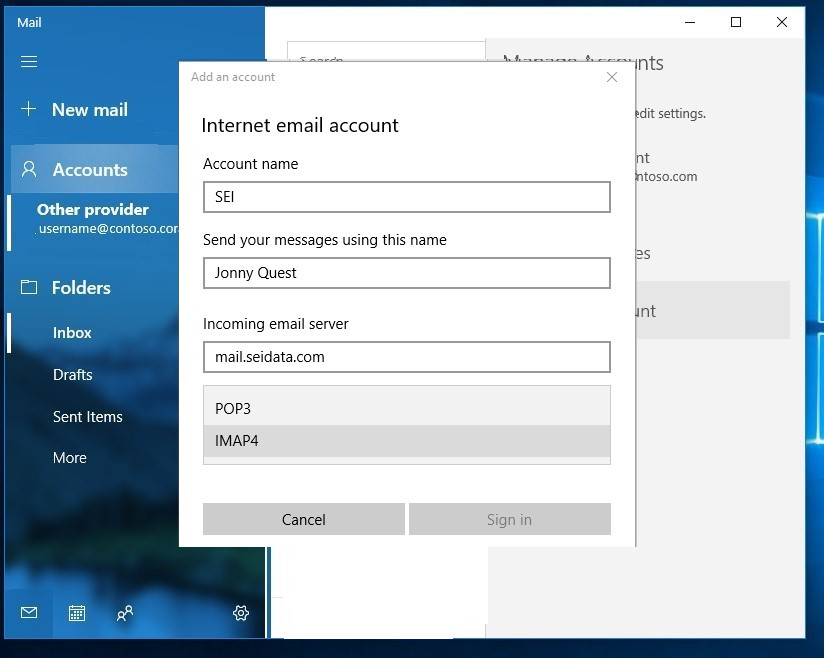
7) Enter SEI in the “Account name” field. Enter characters that you want to appear in the recipient’s FROM field when they receive your mail in the “Store your messages using this name” field. Enter mail.seidata.com in the “Incoming email server” field.
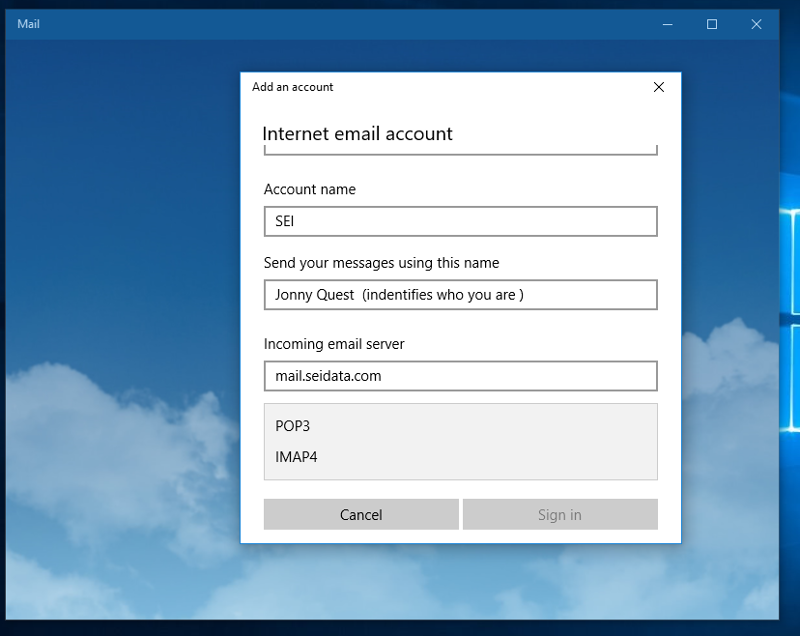
8) Select either POP3 or IMAP4 from the “Account type” pulldown menu options. With POP, a copy of your messages will be stored locally on your device, and depending on the POP account setup, may be deleted from the mail server. With IMAP, your messages stay on the mail server. If you want to access your mail from several devices, it is suggested to choose IMAP. For POP setup, scroll down to the POP setup section.
 NOTE: Use the TAB button, scroll button on your mouse, or move the pointer to the right edge to activate the slide bar to move the fields as needed to continue the mail account setup.
FOR IMAP Setup
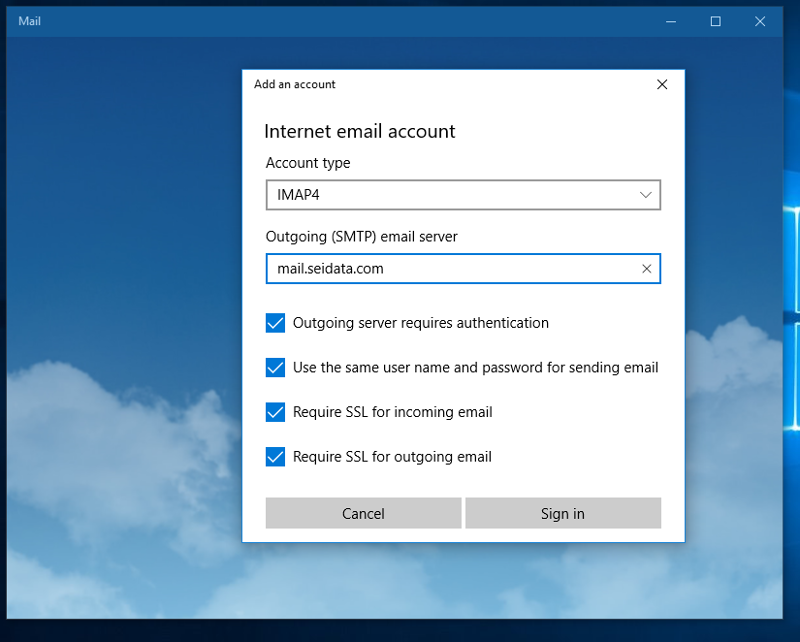
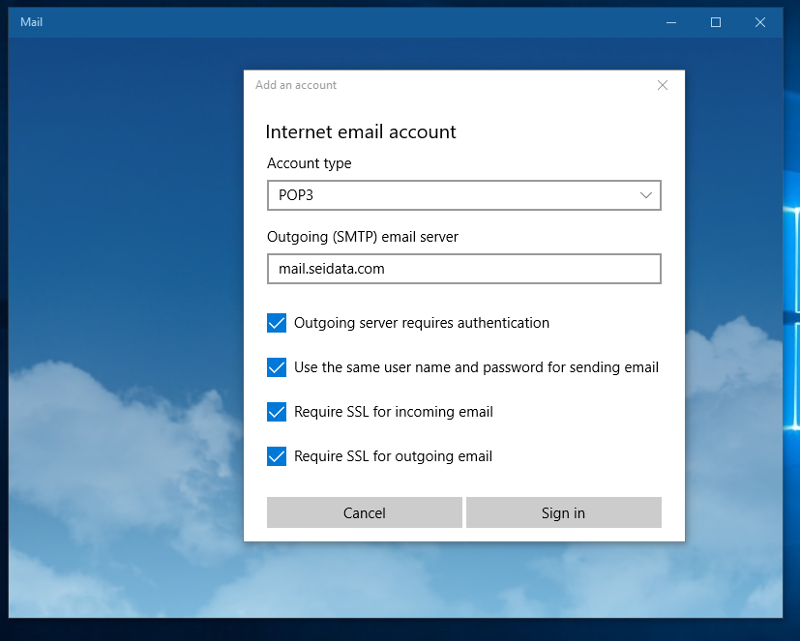
9) Enter mail.seidata.com in the “Outgoing (SMTP) email server” field. Leave the 4 options checked below the field. The “Sign in” button should now be active (not gray in color). Proceed to step 10.
FOR POP Setup
9) Enter mail.seidata.com in the “Outgoing (SMTP) email server” field. Leave the 4 options checked below the field. The “Sign in” button should now be active (not gray in color). Proceed to step 10.
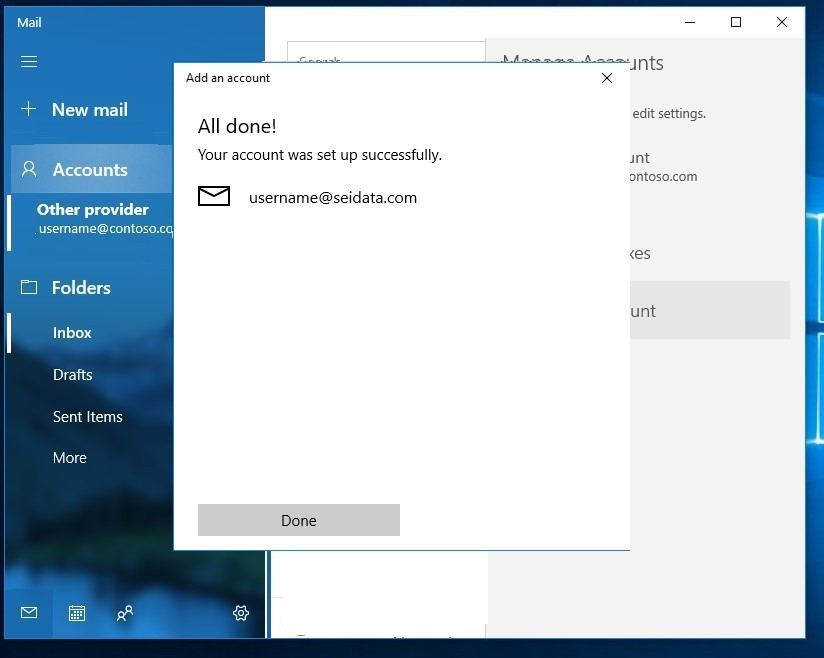
10) Click Sign in.
11) Click done.

You now have your SEI e-mail account ready to go.
Add an Account
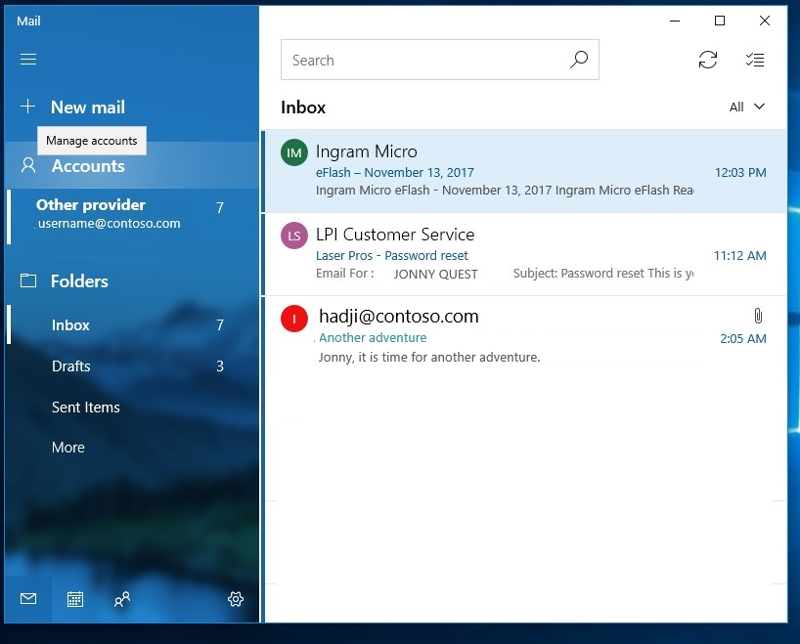
1) Open Mail.
2) Click Accounts.
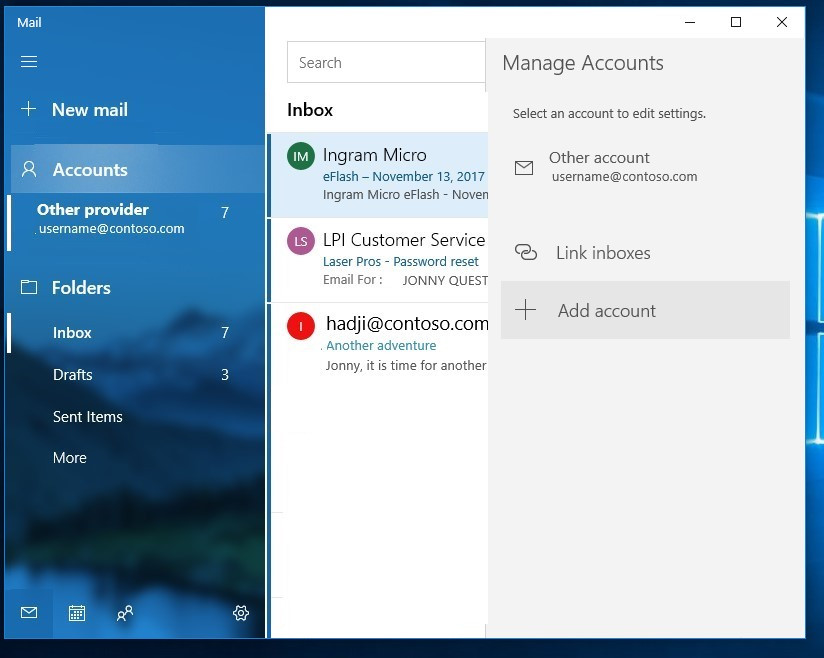
3) Select Add Account.
4) Move your mouse to the right border of the “Choose an account” window. A slide bar should appear.
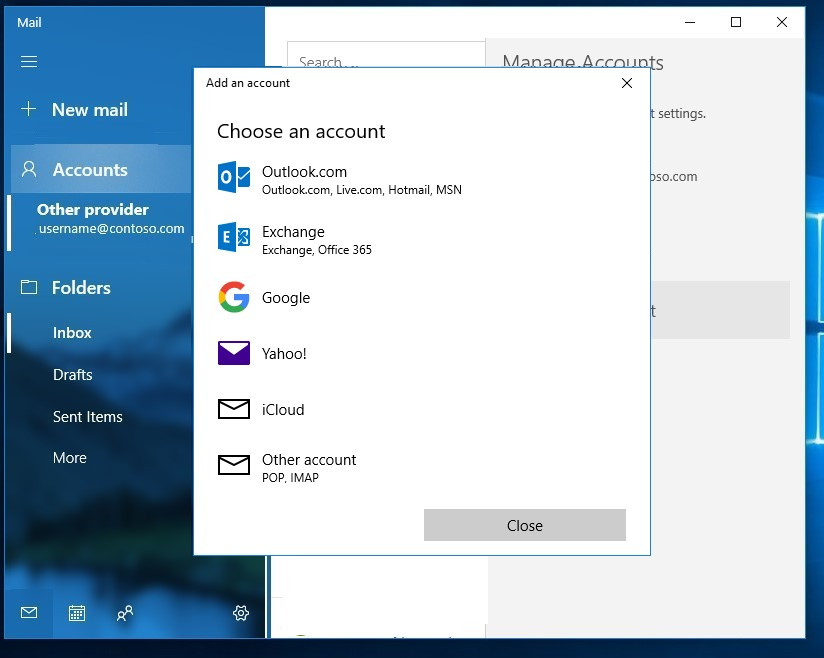
5) Slide the bar down to reveal the “Advanced setup” option and select it. NOTE: The slidebar will disappear shortly after mousing over it. Simply move over the right border again to activate the bar.
6) Select the “Internet email” option.
7) Enter your SEI e-mail address in the “Email address” field. Enter only your username (not the @seidata.com part) in the “User name” field. Enter your password on the “Password” field. NOTE: Once you begin to type the password, an icon will appear in the right corner of the password field. If you click and hold the mouse button, it will reveal what you typed for a password. Once you click away from the password field, the option to view the password is gone.
 NOTE: Use the TAB button, scroll button on your mouse, or move the mouse pointer to the right edge to activate the slide bar to move the fields as needed to continue the mail account setup.
8) Enter SEI in the “Account name” field. Enter characters that you want to appear in the recipient’s FROM field when they receive your mail in the “Store your messages using this name” field. Enter mail.seidata.com in the “Incoming email server” field.

9) Select either POP3 or IMAP4 from the “Account type” pulldown menu options. With POP, a copy of your messages will be stored locally on your device, and depending on the POP account setup, may be deleted from the mail server. With IMAP, your messages stay on the mail server. If you want to access your mail from several devices, it is suggested to choose IMAP. For POP setup, scroll down to the POP setup section.
 NOTE: Use the TAB button, scroll button on your mouse, or move the pointer to the right edge to activate the slide bar to move the fields as needed to continue the mail account setup.
FOR IMAP Setup
10) Enter mail.seidata.com in the “Outgoing (SMTP) email server” field. Leave the 4 options checked below the field. The “Sign in” button should now be active (not gray in color). Proceed to step 11.

FOR POP Setup
10) Enter mail.seidata.com in the “Outgoing (SMTP) email server” field. Leave the 4 options checked below the field. The “Sign in” button should now be active (not gray in color). Proceed to step 10.

11) Click Sign in.
12) Click done.
 You now should see your newly added SEI account along with your other previous accounts.
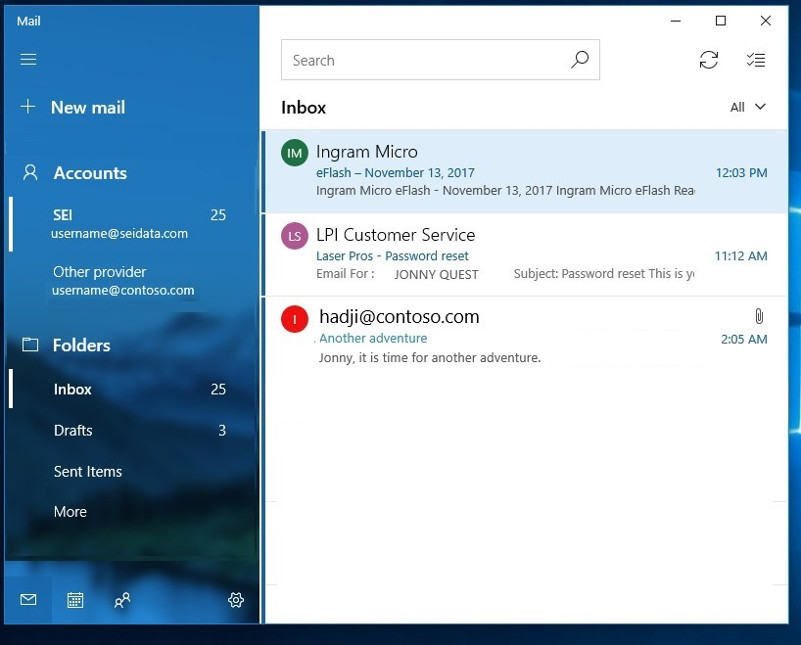
You now have your SEI e-mail account ready to go.
|
Internet Tech Support
Available 24×7
800-925-6746 | 812-574-8800 | 812-667-8800
812-744-8800 | 812-839-8800 | 812-873-8800
|
Cellular Technical Support
Monday through Friday ~ 8:00am to 4:30pm
888-200-8077
|
©2019 SEI Communications. All Rights Reserved. Legal, Privacy, and Security Notices.
|