If you already have and existing account created in Outlook and want to add an account, click here.
Initial Installation
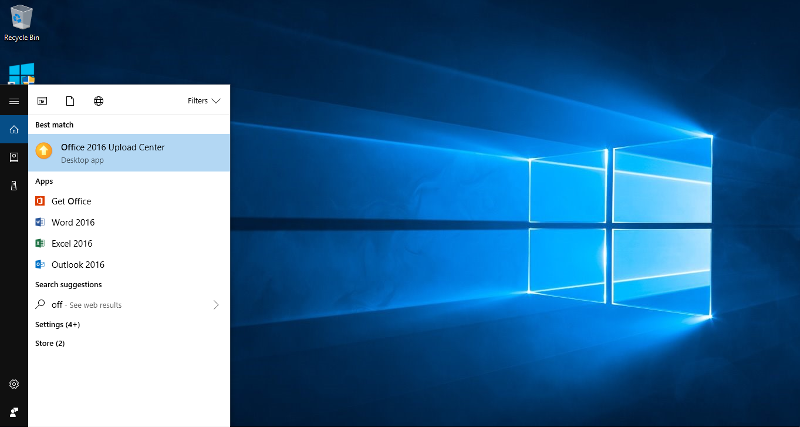
1) Begin typing “outlook” in the search bar. Selections will appear. Select Outlook.
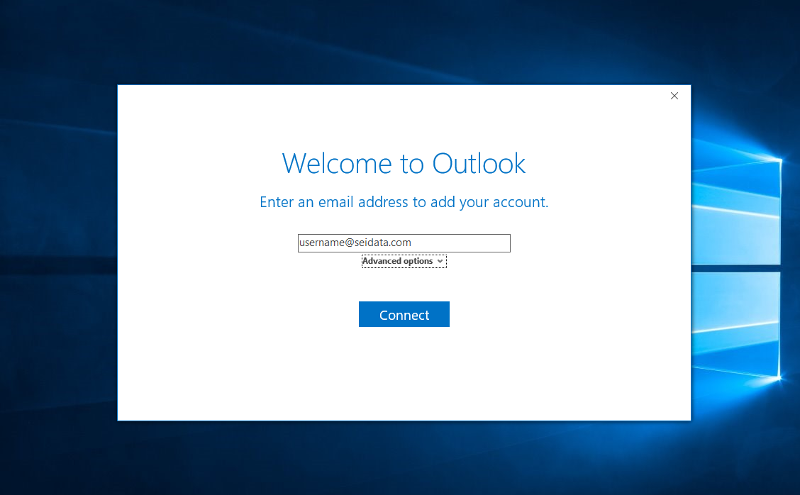
2) Enter your username in the field.
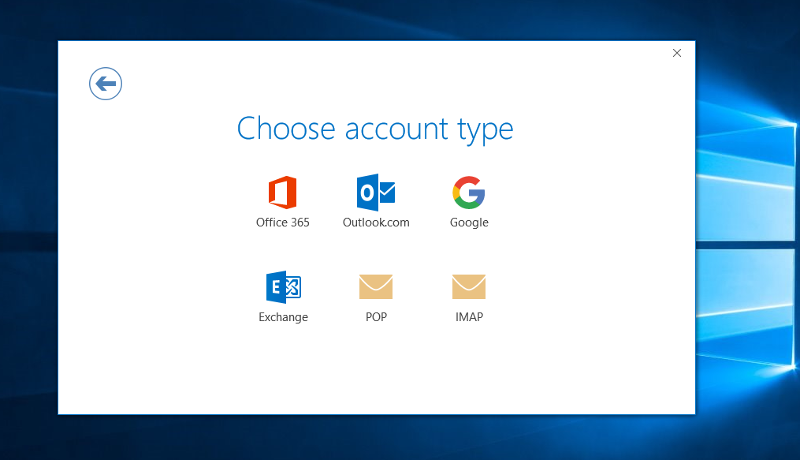
3) Select either POP or IMAP. With POP, a copy of your messages will be stored locally on your device, and depending on the POP account setup, may be deleted from the server. With IMAP, your messages stay on the server. If you want to access your mail from several devices, it is suggested to choose IMAP. For POP setup, scroll down to the POP setup section.
FOR IMAP Setup
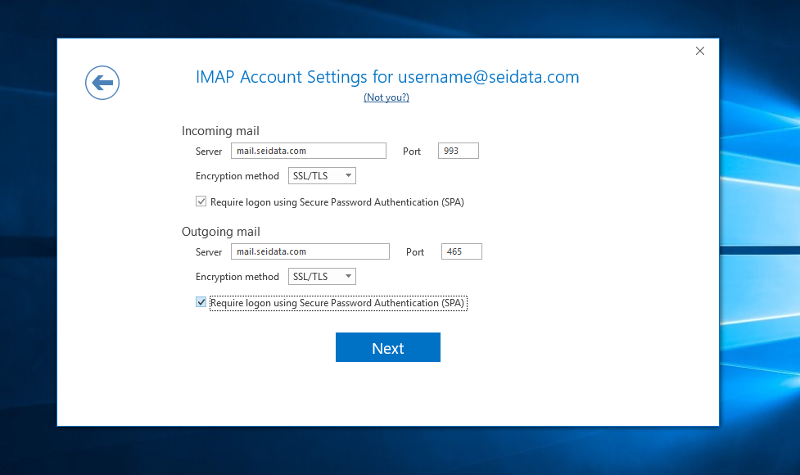
4) Under Incoming Mail, enter mail.seidata.com in the Server field. Change the port number from 143 to 993. Select SSL/TLS from the Encryption method pulldown menu. Click the “Require logon using Secure Password Authentication (SPA)” checkbox.
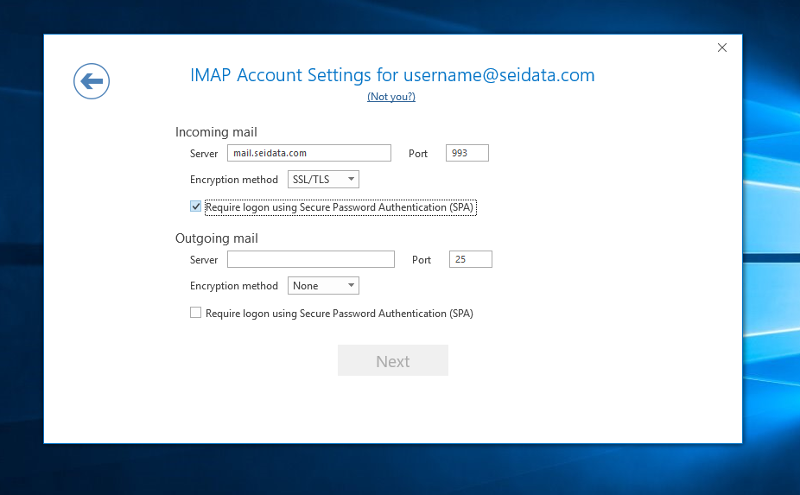
5) Under Outgoing Mail, enter mail.seidata.com in the Server field. Change the port number from 25 to 465. Select SSL/TLS from the Encryption method pulldown menu. Click the “Require logon using Secure Password Authentication (SPA)” checkbox. The next button should be now be active (not gray in color). Proceed to step 6.
FOR POP Setup
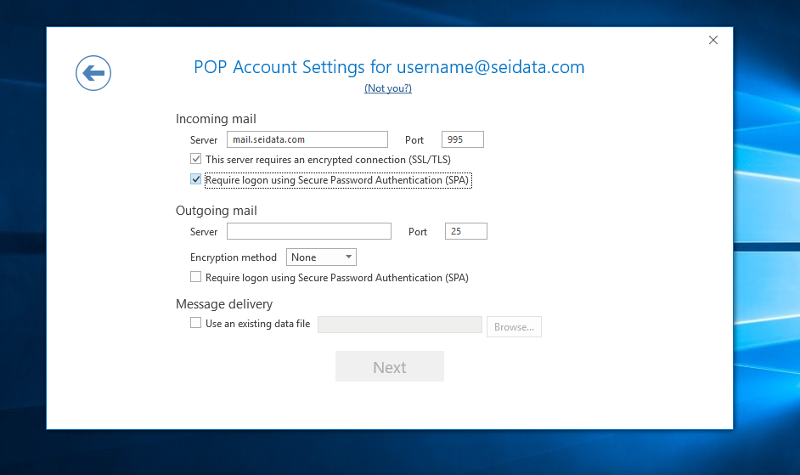
4) Under Incoming Mail, enter mail.seidata.com in the Server field. Change the port number from 143 to 995. Click the “This server requires an encrypted connection(SSL/TLS) checkbox. Click the “Require logon using Secure Password Authentication (SPA)” checkbox.
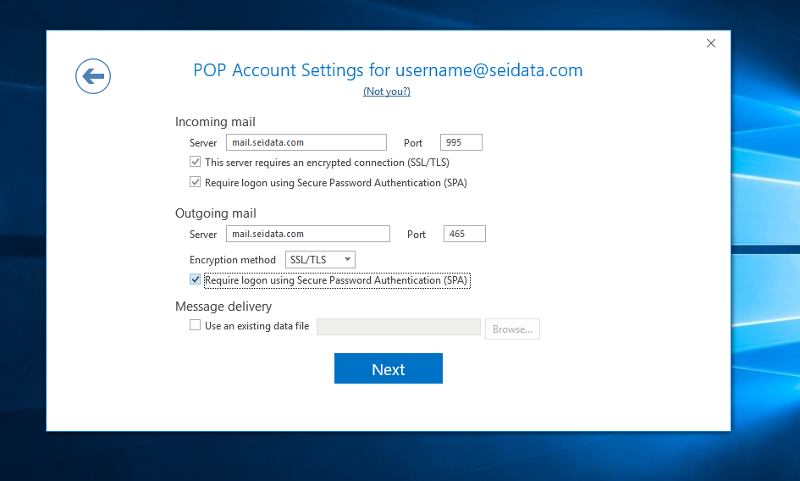
5) Under Outgoing Mail, enter mail.seidata.com in the Server field. Change the port number from 25 to 465. Select SSL/TLS from the Encryption method pulldown menu. Click the “Require logon using Secure Password Authentication (SPA)” checkbox. The next button should be now be active (not gray in color).
6) Click NEXT>.
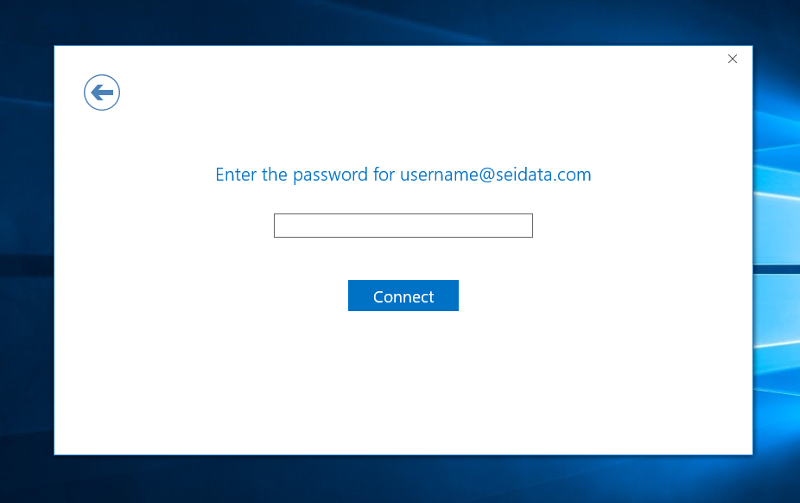
7) Enter your password.
8) Uncheck the “Set up Outlook Mobile on my phone, too” checkbox. Click OK. You now have your SEI e-mail account ready to go.
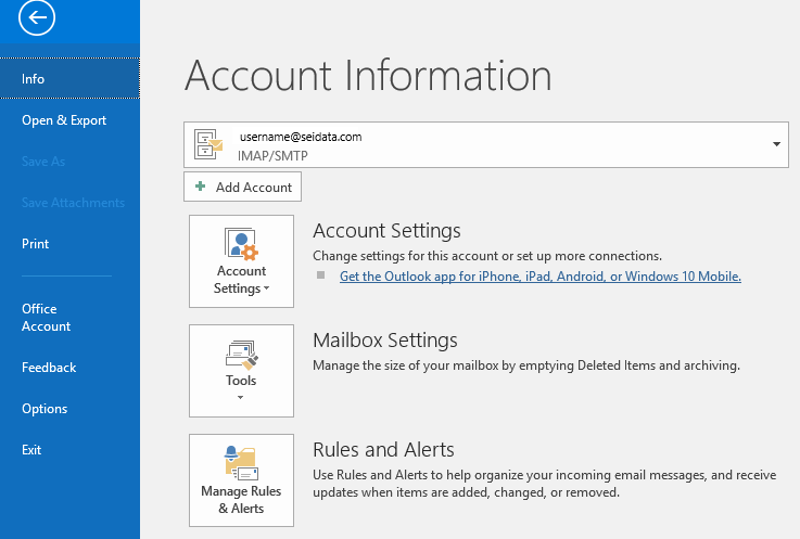
Add an Account
1) Open Outlook.
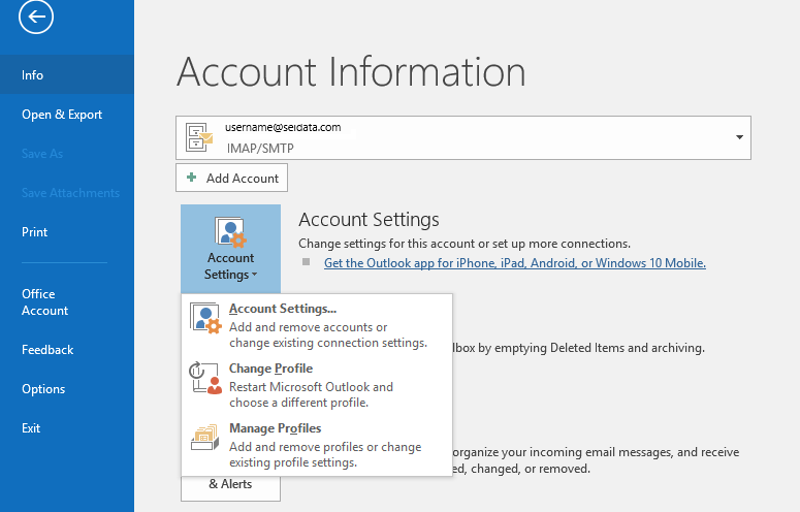
2) Click on Tools and select Account Settings.
3) Select Account settings again.
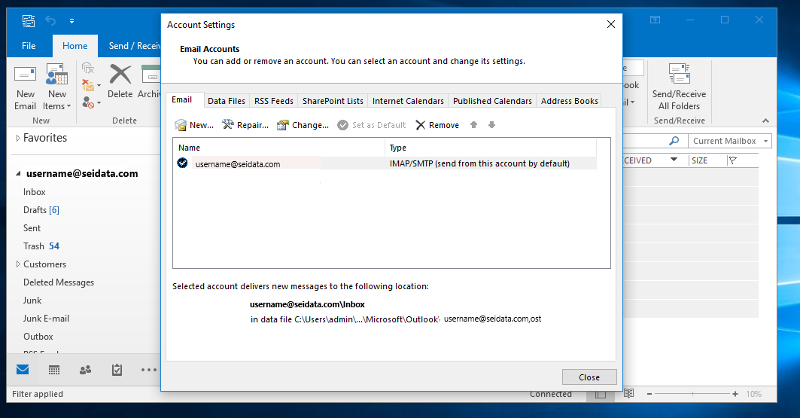
4) Select New…
2) Enter your username in the field.
3) Select either POP or IMAP. With POP, a copy of your messages will be stored locally on your device, and depending on the POP account setup, may be deleted from the server. With IMAP, your messages stay on the server. If you want to access your mail from several devices, it is suggested to choose IMAP.
FOR IMAP Setup
4) Under Incoming Mail, enter mail.seidata.com in the Server field. Change the port number from 143 to 993. Select SSL/TLS from the Encryption method pulldown menu. Click the “Require logon using Secure Password Authentication (SPA)” checkbox.
5) Under Outgoing Mail, enter mail.seidata.com in the Server field. Change the port number from 25 to 465. Select SSL/TLS from the Encryption method pulldown menu. Click the “Require logon using Secure Password Authentication (SPA)” checkbox. The next button should be now be active (not gray in color). Proceed to step 6.
FOR POP Setup
4) Under Incoming Mail, enter mail.seidata.com in the Server field. Change the port number from 143 to 995. Click the “This server requires an encrypted connection(SSL/TLS) checkbox. Click the “Require logon using Secure Password Authentication (SPA)” checkbox.
5) Under Outgoing Mail, enter mail.seidata.com in the Server field. Change the port number from 25 to 465. Select SSL/TLS from the Encryption method pulldown menu. Click the “Require logon using Secure Password Authentication (SPA)” checkbox. The next button should be now be active (not gray in color).
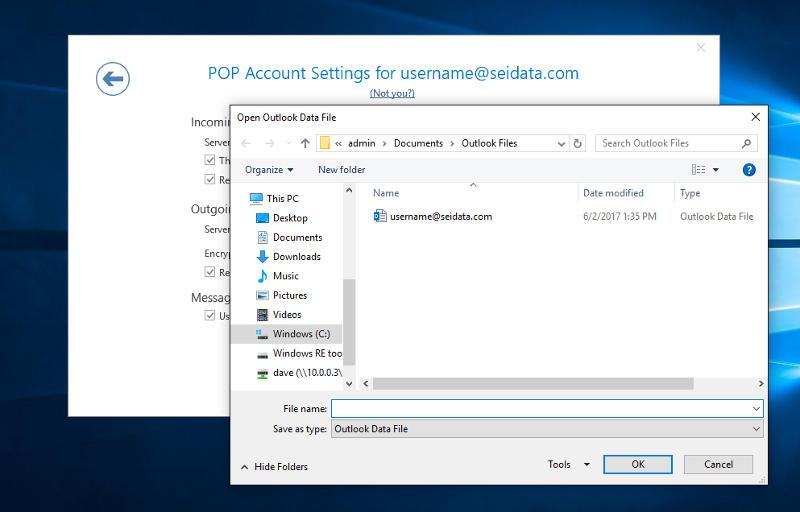
If you have an existing Outlook Data File and want to import it, do the following; otherwise proceed to step 6.
1) Under Message Delivery, click the “Use the existing data file” checkbox.
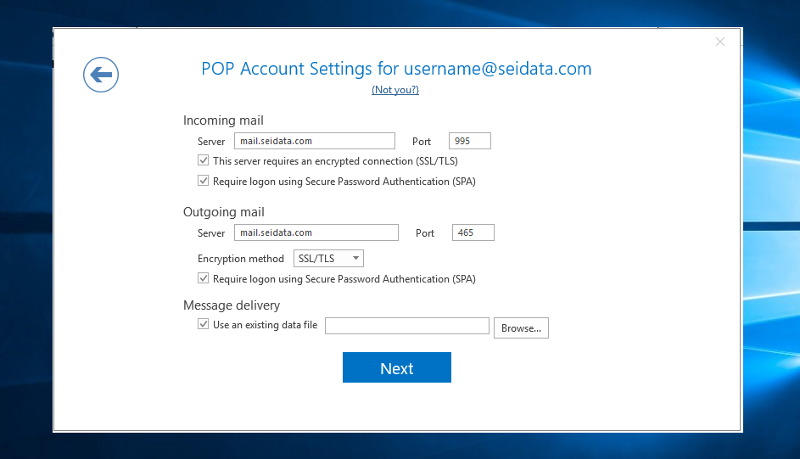
2) Click the Browse button and locate your data file. The default location is in your Outlook Files folder within your Documents folder.
6) Click NEXT>.
7) Enter your password.
8) Uncheck the “Set up Outlook Mobile on my phone, too” checkbox. Click OK. You now have your SEI e-mail account ready to go.
|
Internet Tech Support
Available 24×7
800-925-6746 | 812-574-8800 | 812-667-8800
812-744-8800 | 812-839-8800 | 812-873-8800
|
Cellular Technical Support
Monday through Friday ~ 8:00am to 4:30pm
888-200-8077
|
©2019 SEI Communications. All Rights Reserved. Legal, Privacy, and Security Notices.
|