Urgent: Internet OutageWe are aware of the Internet outage which is due to our upstream internet providers having a cut fiber cable. They are in route to repair the cut cable.No ETA has been provided to us at this time. We’ll provide updates as they are provided to us.We understand the inconvenience this may cause and appreciate your patience and understanding while our team works to restore service.
Select Page
Security Configuration
SEI Communications, Inc – A Total Internet and Communications Company
Sometimes it is beneficial to ensure certain devices on your LAN always retain the same IP Address. This is helpful for devices that communicate with other devices also on your LAN such as printers, security cameras, network video recorders, etc. This ensures that nothing needs to be reconfigured should the device request a new address. If it did the Router would ensure the device always has the same one.
1) From a web browser, go to “http://192.168.1.1”. Login with the username “admin” and the password “seiadmin”.
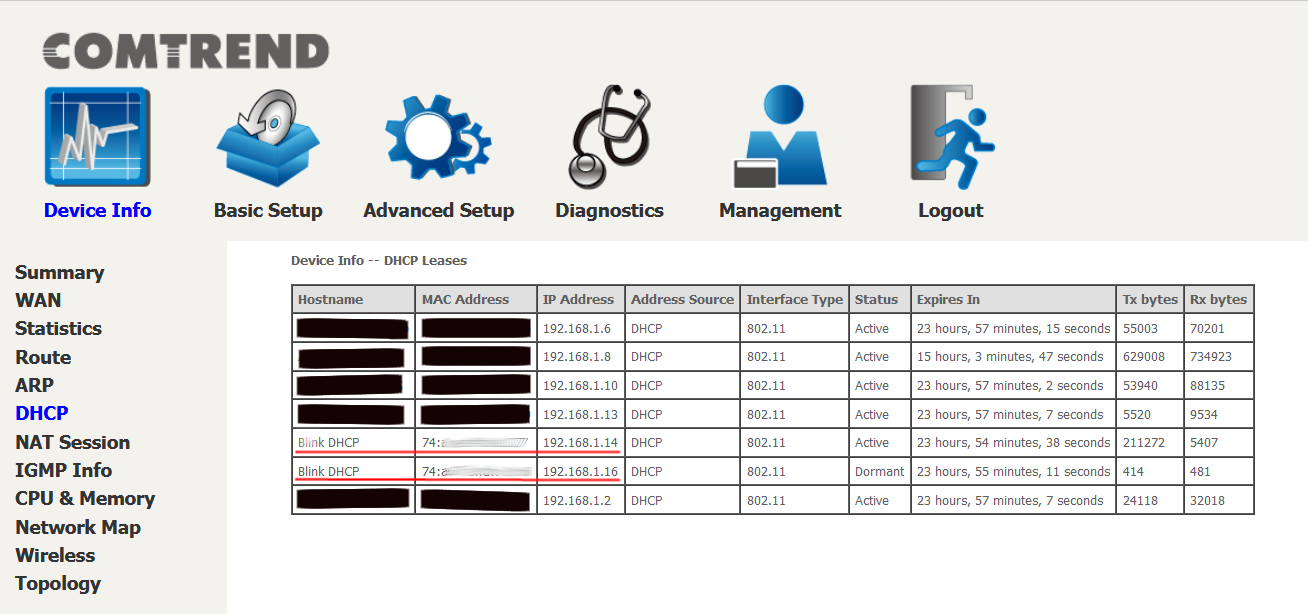
– If camera/device is getting it’s IP address via DHCP, you must reserve an IP for it so it remains the same (static).
– To determine device’s IP address, select DHCP under Device Info.
Copy the device MAC address to clipboard (highlite, CTRL+C).
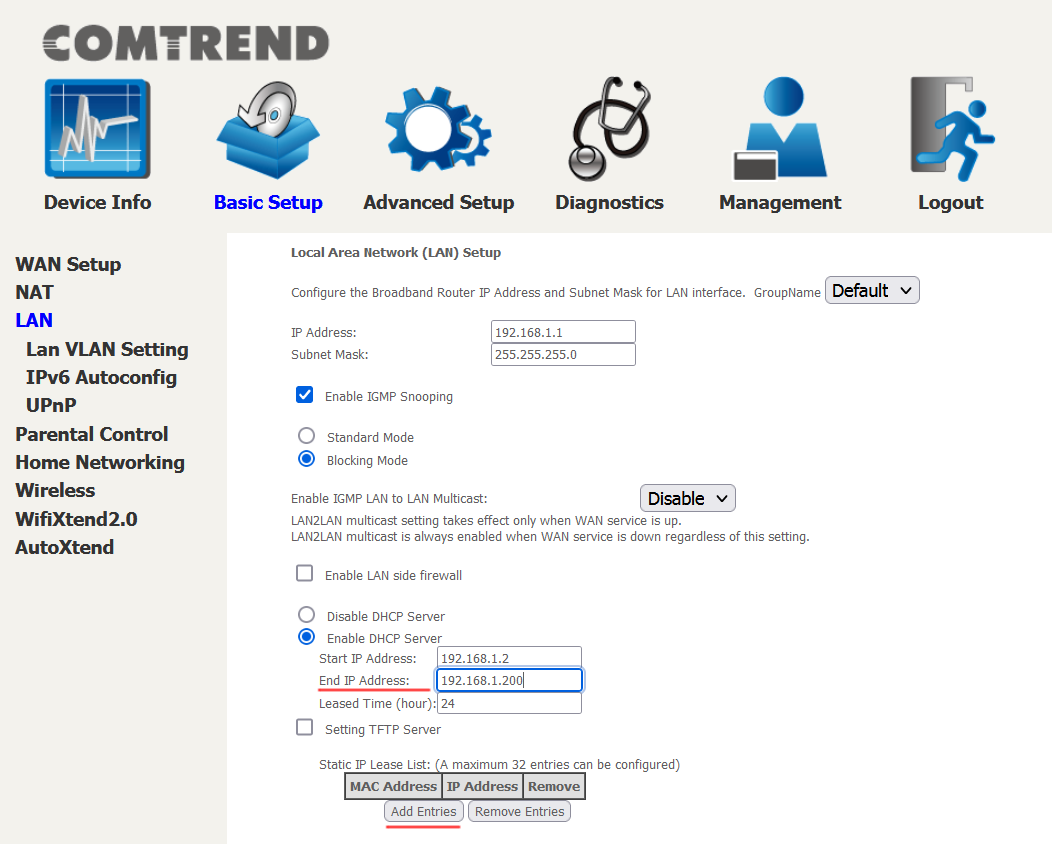
2) Click the “Basic Setup” link on the top menu bar. Then Select “LAN” at the side menu bar.
– Change the “End IP Address” from 192.168.1.254 to 192.168.1.200
– Click on Appy/Save at bottom of screen.
– Click on “Add Entries” under Static IP Least List.
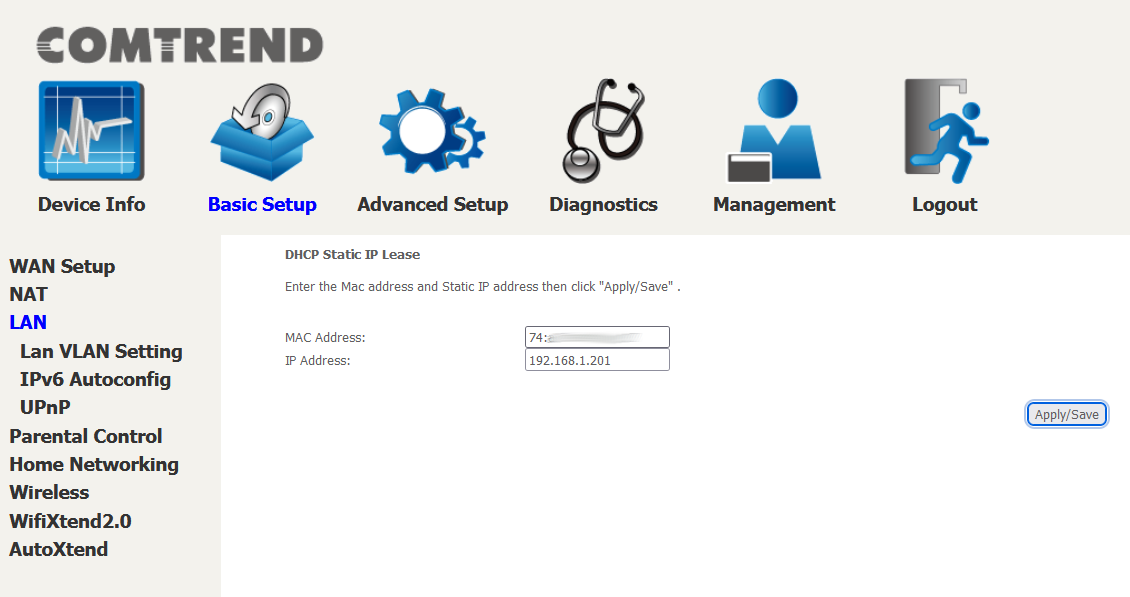
3) Put in the MAC address of the device and put in a valid IP address. In this case, any ip from 192.168.1.201-254.
– Click on Apply/Save
– You may need to power cycle device to get the new address. Confirm new IP lease going back to Device Info/DHCP.
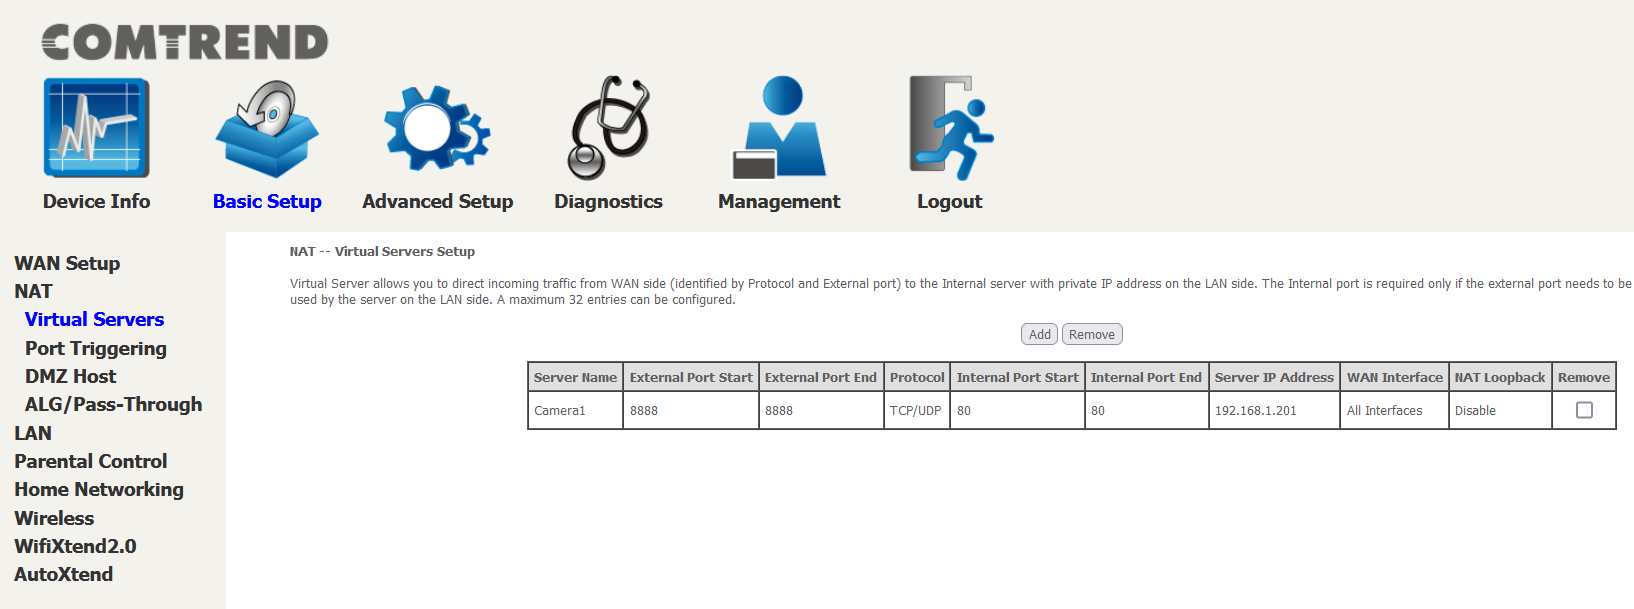
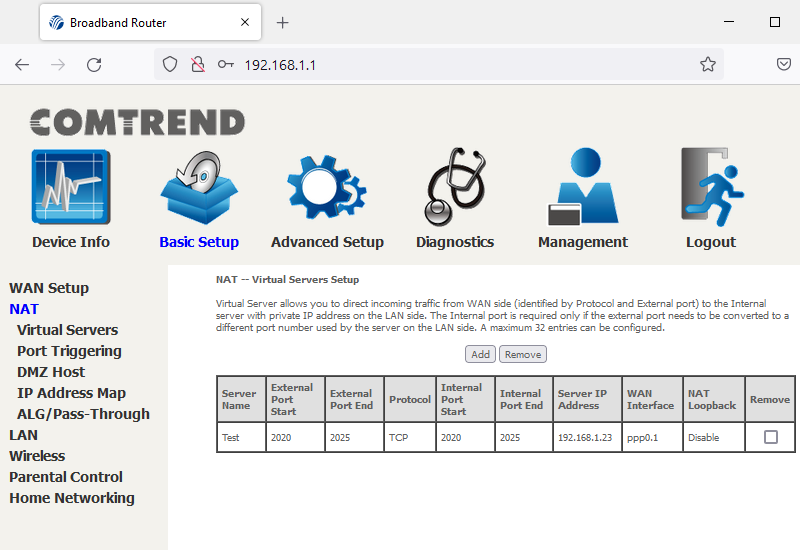
Now that the device has a fixed IP address, we need to forward traffic to it.
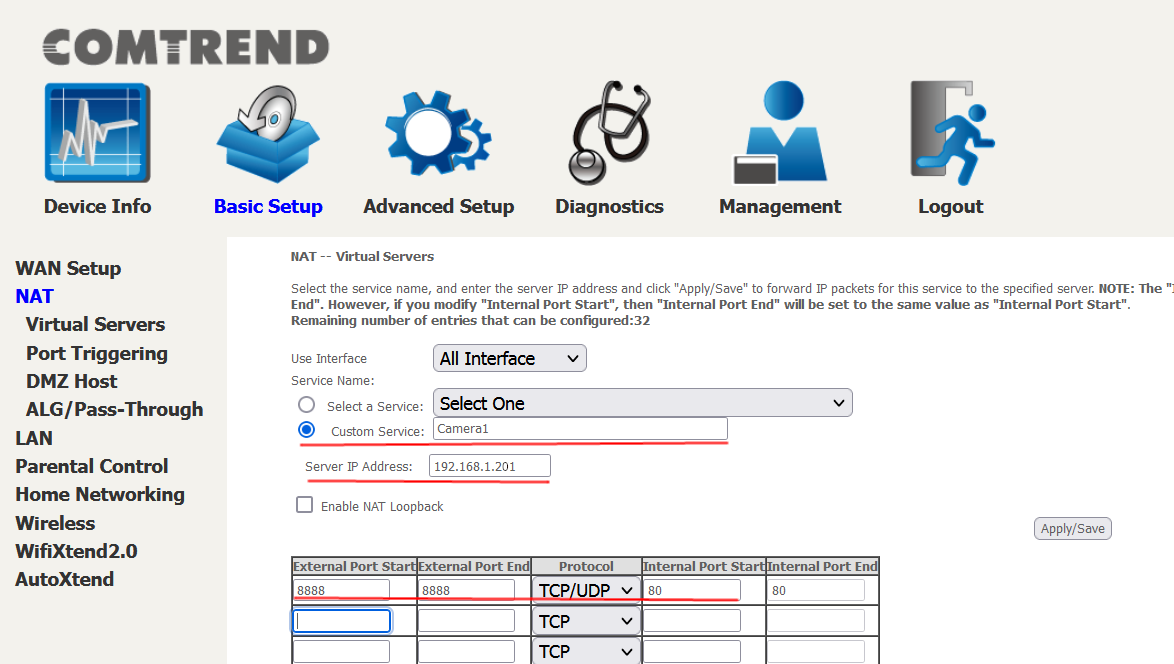
4) Click the “Basic Setup” link on the top menu bar. Then Select “NAT” at the side menu bar. Finally click the “Virtual Servers” under NAT
– Click on Add. – You need to reboot your router.
5) Select Customer Service and type in a description.
– Set Server IP address to the appropriate address.
– Set External Port Start and Stop to a number greater than 1024 and less than 65535.
– Protocol and Internal port start settings will be determined by the device. Please consult device manual/manufacturer for settings.